Essential Hand Tools for Furniture Repair

Today’s chosen theme is “Essential Hand Tools for Furniture Repair.” Step into a welcoming, hands-on tour of the tools that turn wobbly chairs, sticky drawers, and tired finishes into proud, sturdy pieces. Stick around, share your questions, and subscribe for more practical, approachable fixes.

Build Your Core Kit with Confidence

A claw hammer, a set of quality screwdrivers, a block plane, a couple of sharp chisels, a flush-cut saw, and a combination square will solve most repair puzzles. Tell us which of these you already own and which you’re curious to try first.

Build Your Core Kit with Confidence

Begin with dependable mid-range tools that hold an edge and feel balanced in hand. Later, upgrade chisels, add a low-angle block plane, and expand clamps. Comment with your upgrade roadmap so fellow readers can learn from your experience.

Match the Tip to the Head, Every Time

Phillips, slotted, Pozidriv, and square-drive screws each need the correct tip size and profile. A snug fit prevents cam-out and preserves old hardware. What screw type trips you up most? Ask below and we’ll help decode it.

Ratcheting Handles and Bit Sets That Earn Their Keep

A compact ratcheting screwdriver with hardened bits reaches awkward spots under chairs and inside cases. Add magnetic pick-up and flexible extensions for tight corners. Post your favorite driver setup for tricky cabinet interiors.

Removing Stripped or Stuck Screws

Seat the driver firmly, tap it once to break corrosion, then apply steady pressure. Use a screw extractor when heads are mangled. Heat can soften old glue. Share your toughest extraction story and what finally worked.
A 6–12 mm pair plus a wider chisel handles most mortises, hinge gains, and glue cleanup. Use a light mallet, skew the cut, and let sharpness do the work. Which chisel width do you reach for most?

Chisels, Planes, and Sharp Edges That Transform Repairs

Back Saws for Dead-True Shoulders and Tenons

A fine-tooth back saw excels at controlled cuts for patches, stringing, and tidy shoulders. Let the spine keep you straight, and pace your stroke. Share a photo of your favorite saw plate and handle style.

Why a Japanese Pull Saw Belongs in Your Kit

Pull saws cut on the pull stroke, giving slender blades remarkable control in cramped spaces. They shine for delicate trims and clean end-grain. Have you tried one on a chair rung repair? Tell us how it felt.

Flush-Cut Magic for Pegs and Plugs

A flexible flush-cut saw trims dowels and plugs without marring adjacent surfaces. Add a layer of tape as insurance and finish with a plane or chisel. What’s your favorite trick for invisible plug repairs?

Measure, Mark, and Verify Before You Cut

A reliable combination square sets depths, checks 90°, and helps transfer lines around corners without drift. Keep it calibrated and clean. What’s your go-to trick for squaring a hidden corner inside a cabinet?

Measure, Mark, and Verify Before You Cut

A marking knife severs fibers, guiding chisels and saws for cleaner edges. Follow with a light pencil for visibility. Do you prefer a single-bevel or double-bevel knife? Tell us why.

Clamp Smarter, Not Harder

F-style clamps are quick; parallel-jaw clamps keep panels flat; C-clamps sneak into tight spaces. Wooden handscrews add angled control. Which clamp did you underestimate until it saved a repair?

Clamp Smarter, Not Harder

Assemble everything without glue to verify alignment, pressure points, and reach. Mark clamp positions with tape so glue-up becomes choreography. What dry-fit hack changed your process forever?

Glue-Up Helpers and Tiny Accessories That Matter

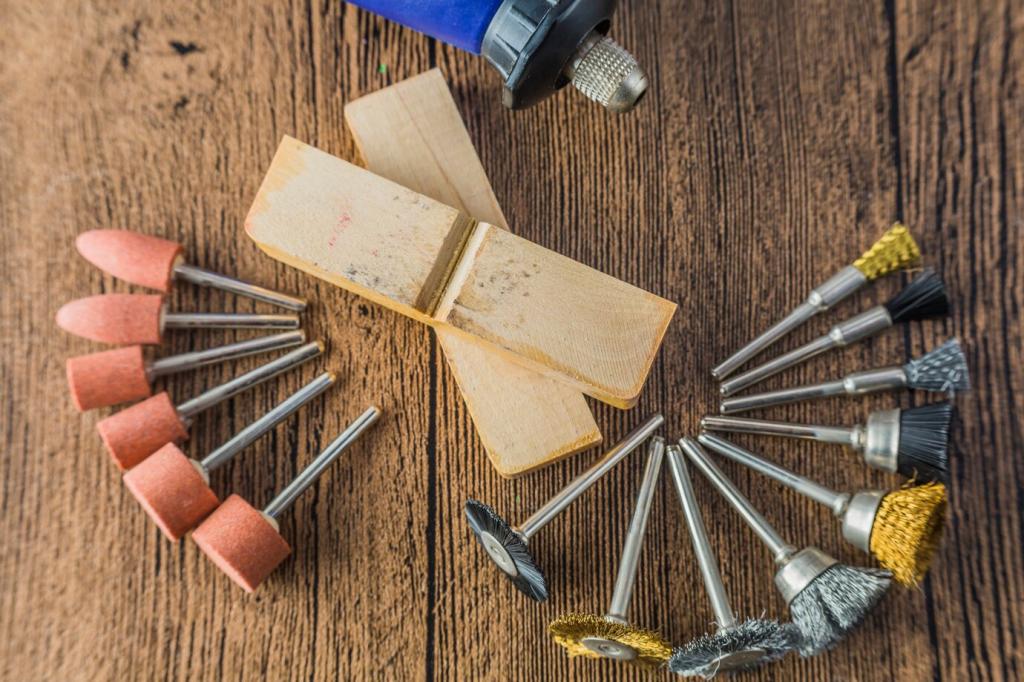
Acid brushes, foam rollers, and blunt syringes place adhesive exactly where it belongs, not on your finish. Keep a cup of water ready. Which applicator gives you the most control inside joints?

Glue-Up Helpers and Tiny Accessories That Matter

Let squeeze-out gel, then lift it with a chisel at a low angle. Use a straw in corners, and avoid wet smears on open grain. What’s your go-to cleanup timing?

Care, Storage, and Rust Prevention for Hand Tools

Wipe steel with a rag lightly oiled in camellia or mineral oil. Remove dust that wicks moisture, and store tools dry. What’s your preferred rust inhibitor in humid climates?

Care, Storage, and Rust Prevention for Hand Tools

Keep chisels in a roll, planes on their side or with the iron retracted, and saw teeth covered. Sharp tools are safer. Show us your compact storage solution for a small apartment shop.

Anecdotes from the Bench: Small Tools, Big Wins

01

The Wobbly Heirloom Chair That Finally Sat Still

A loose mortise resisted glue until a thin paring cut with a sharp chisel made space for a snug patch. A patient dry fit and two handscrews finished the job. Share your chair triumph below.
02

The Drawer That Refused to Slide

A low-angle block plane kissed high spots on the runners, then a marking knife defined a tiny repair shim. After a gentle wax, the drawer sighed home. Tell us your favorite drawer-tuning trick.
03

A Split Tabletop Rescued Without Power Tools

Two F-clamps, a straight caul, and a flush-cut saw handled the split. A syringe delivered glue deep, and a chisel lifted gelled squeeze-out cleanly. Have a tabletop save to share with readers?
Unitedstatesbolivarianparty
Privacy Overview

This website uses cookies so that we can provide you with the best user experience possible. Cookie information is stored in your browser and performs functions such as recognising you when you return to our website and helping our team to understand which sections of the website you find most interesting and useful.